
Images can describe the content in a more visual way, make the content more attractive and thus increase the conversion rate, is an essential element of the page. However, too many images/too large will increase the page size, resulting in slow loading speed, increasing the burden on the server and CDN traffic costs.
groundHTTP ArchiveOn average, images make up about half of the average website page size, making optimizing images one of the keys to reducing website size and increasing page load speed.
Why must WordPress websites compress images?
We at Diamo have seen many websites with huge photos that are not compressed and optimized. The page loads slowly and the pictures take a long time to load. This kind of website customer experience is extremely poor, giving visitors a very bad first impression, most customers will choose to bounce.
In general, the page volume of 60% (or even more) is the picture, by compressing the picture can be in the case of no loss of picture quality greatly reduces the page volume. Thus greatly shorten the loading time and shrink bandwidth, CDN costs, but also to improve improve user experience, SEO results and conversion rates, very necessary.
What is WebP, Avif image format?
The best way to reduce the size of the image without reducing the clarity is to convert the image from Jpg/Png format to WebP/Avif format, greatly reducing the size, but the clarity is basically unchanged, very clear.
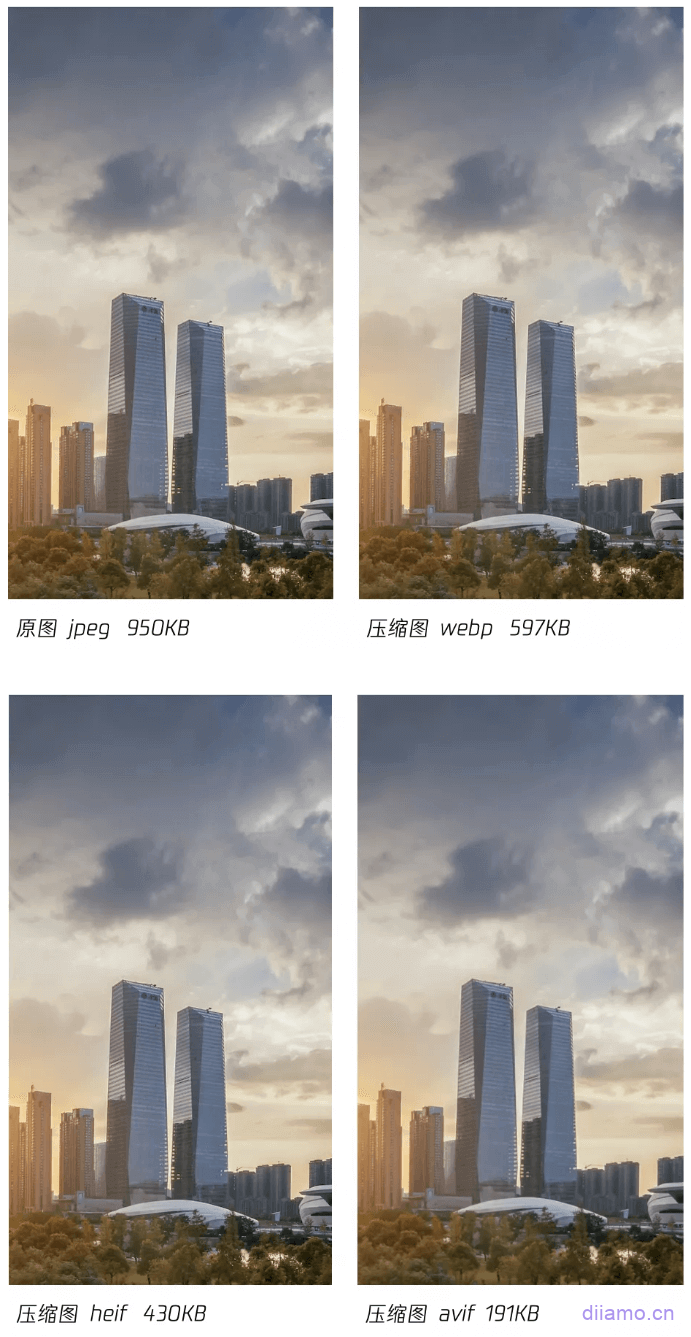
WebP and Avif format is a new generation of image formats, WebP than JPG volume reduction of 30%-60% or so, clarity but better!WebP volume reduced by 25% or so, but better clarity! We encountered some images no matter how to compress the volume can not be reduced, after the conversion of WebP/Avif clarity did not decline, but the volume is much smaller!Nowadays, optimizing the image size is definitely going to require the WebP/Avif format.
Pictured below areBrowser versions that support WebP formatThe green color represents support, the brown color is partial support, and the red color indicates no support. As you can see from the chart below, all other browsers are supported except for Internet Explorer, which has been replaced by Edge, so you can boldly rest assured that you can use WebP.

The Avif format is more advanced, with an average size reduction of about 251 TP3T compared to the WebP format, but with higher definition! The Avif format is very necessary!Currently not supported by QQ and Internet Explorer(below), which is already supported by many browsers.ShortPixeland Optimole and a few other plug-ins support to Avif, and generally need to pay. WebP effect is already very good, wait for Avif popularity and then use Avif is also OK, of course, direct one-step is best.

WordPress image compression optimization is best achieved by installing compression plugin. Diamo according to the use of experience to select and compare 4 excellent image optimization plugin for you to choose.
Don't directly upload Avif format images to the website for use (WebP is OK), some devices don't support Avif, which will lead to abnormal image display. It is recommended to upload Jpg, Png, WebP format, and then use the plug-in to generate Avif format. When encountered does not support this format device automatically back to display the original format.
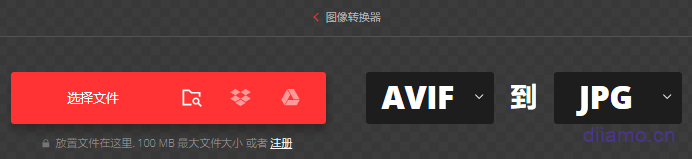
Converting image formats can be done usingConvertioThere are a lot of free online conversion tools, such as Baidu. Select the original image and target image format, then upload the image and click "Convert".
Choose the correct image format, size, and resolution (DPI)
Regular images should be in Jpg format, which displays well and has the smallest size. In fact the vast majority of images should be prioritized in jpg format.
PNG is a lossless format, clearer and generally larger in size. Transparent background images or some high-definition icons, etc. should choose PNG format. Text screenshots and other pictures with a single color or few colors should also choose PNG format, the volume is smaller than JPG. Knowledge point: WebP format supports transparent background.
Icons, Logos, cartoon illustrations and so on, try to choose SVG format, whether zoomed in or out are very clear, the minimum volume. If a page of SVG icons up to a dozen volume to dozens of KB, change to woff and other icon fonts will reduce the volume.
If the animation is only 1-3 seconds long, you can view it in Gif format, if it is longer, it will be smaller in size if you convert it to video format, and the video can be delayed to load faster.
Charting should also pay attention to the size, according to the actual size of the display to make pictures so that the display is the most clear, the size of the smallest. For example, if the displayed size is 600px, make a 600px image to show the clearest and smallest size.
If the size of the photo is larger than 600px, the clarity of the image displayed may be reduced, and the loading speed will be relatively slow because of the large size. If it is a responsive web page, we should also consider the size of the picture on the cell phone, and the size of a picture displayed on the cell phone may be larger than that on the computer.
If the product detail page product pictures will be with magnifying glass effect, the picture size should be made a little larger. Cell phone image display size is smaller than the computer side, use elementor and so on to create a separate page to set the size of the cell phone image display a little smaller, or directly use a smaller size of the picture.
Image resolution (DPI)It is also an important factor that affects the image volume, the higher the DPI the larger the image volume. Have you ever encountered that no matter how to compress the image volume is very large? That's because the DPI of the image is set too high, some artists will make the image 300DPI considering the print quality or the drawing habit.
DPI is only useful for printing, the higher the value, the clearer the printout. However, DPI is not used for web display, no matter it is set to 300 or 72, the size and clarity of the image displayed on the web is the same, but the volume of 300DPI image is several times that of 72DPI!
So when making pictures, you must set the DPI to 72, or save the picture output as "web page common format" (will automatically set 72DPI), which can greatly reduce the size of the picture. Secondly, you should also use RGB format instead of CMYK, which is only useful for printing and not helpful for displaying on the web page, but the volume is larger.
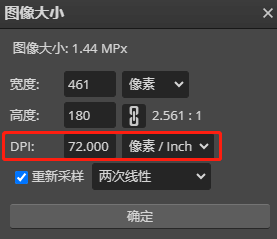
If the image has already been created, modifying the DPI directly using PS, etc. will result in a smaller image size. It is recommended to use the freeOnline photo resolution (DPI) modification toolsModify the image DPI to 72, the image size will be saved unchanged.
WordPress image compression plugin comparison recommendation
Let's start with the conclusion that there is no best image compression plugin, only the most suitable one. You have to choose the right method according to your website and the number/quality of images. The most important thing for images is to display clearly! Not small size loads fast. Clear images increase the conversion rate and make the viewers happy.
A photo with more or less than a dozen KB has a basically negligible impact on speed, and you can also use delayed loading, preloading and other methods to optimize image loading.
1) If you are willing to spend a little money, we recommend that you use it directlyShortPixelIt is a full-featured compressor with good results, supports Avif, and saves you time. Spend $9.9 to buy a permanent compression package can compress 10,000 photos, minus the thumbnail size and WebP, Avif quota can actually compress 1,000~2,000 photos, small and medium-sized websites are enough. After the compression quota is used up, you can get 100 free compression quota every month.
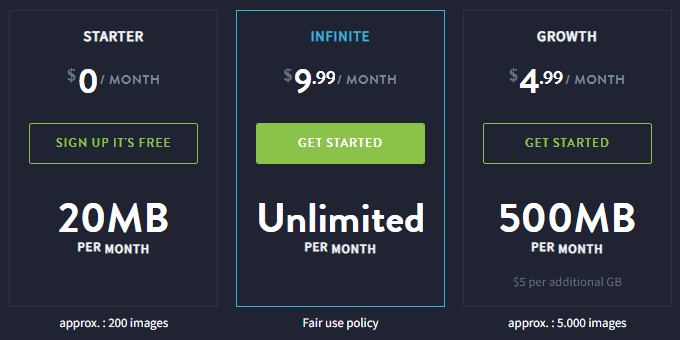
2) Recommended if you don't want to spend a dime and don't have many picturesImagify, save + free + good results. Free account with 20M/month compressed credit.You can register multiple free accounts to switch between themThe website is enough for a small site. Spare money can also spend $4.99 to buy 500M compression quota (can compress 300-500 photos, valid for one month), $9.99 unlimited compression quota (valid for one month).
3) If none of the above options are suitable, and you don't want to spend the money, and you don't want the hassle of signing up for multiple accounts and switching between them.RecommendedEWWW Image OptimizerorRobin Image Optimizer proEWWW can also generate WebP format. These 2 plug-ins do not limit the amount of compression, you can adjust the compression level, you can change the quality of the compressed image as well as restore the original image. ewww can also generate WebP format.Specific use depends on your website and picture situation, it is recommended to install both to try and choose the right one.
4) If you use SiteGround Optimizer, LiteSpeed Cache and other plug-ins, it is recommended to use the plug-ins come with the image compression function, there is no limit to the amount of money, simple and trouble-free, you can also turn WebP.
5) If the website has dozens or hundreds of imageslit. ten thousand sheetsRecommended useOptimoleCloud compression, high quality, with CDN, paid packages starting at $20/mo.. You can upload all pictures to cloud storage for use and delete them from the media library, greatly saving hard disk space. You can move the cloud pictures back to the media library with one click.
6) Some people like to compress their images before uploading them to their media library for use, and this is one way to do it, there are many free online compression tools that work well.
Optimole, ShortPixel, Imagify, TinyPNG (2022.12) Detailed Comparison Table
| EWWW Image Optimizer | ShortPixel | Imagify | Robin Image Optimizer | |
| installed base | 1,000,000+ | 300,000+ | 700,000+ | 100,000+ |
| user reviews | 5 stars | 4.5 stars | 4.5 stars | 4.5 stars |
| free version | unlimited amount | 100 sheets | 20M | unlimited amount |
| lowest-paying package | $7/month | $4.99/month - 7,000 times | $4.99/month-500M | $39/month - 5000 sheets |
| WebP format | ✓ | ✓ | ✓ | paid-for |
| Avif format | paid-for | ✓ | ✕ | paid-for |
| CDN | paid-for | paid-for | paid-for | paid-for |
| Automatic resizing | ✕ | ✓ | ✕ | ✕ |
| Retina Support | ✕ | ✓ | ✓ | ✕ |
| Delayed loading | ✓ | ✕ | ✕ | ✕ |
| Adjustment of compression level | ✓ | ✓ | ✓ | ✓ |
| Compression method | this localitycompressed | Online Compression | Online Compression | local compression |
| Png to Jpg | ✓ | ✓ | ✕ | ✕ |
| Compressed Gif | ✓ | ✓ | ✕ | ✕ |
| dominance | Unlimited amount, WebP support, adjustable compression level, adjustable quality after compression, recoverable original image | WebP supportrespond in singingAVIF,Adjustable compression level, adjustable quality after compression, restoration of the original picture, the most complete functions. | WebP support,Adjustable compression level, adjustable quality after compression, recoverable original image | Unlimited amount, adjustable compression level, adjustable quality after compression, recoverable original image, easy setup |
| drawbacks | AVIF is not supported,Free version does not support compression of PNG, local compression eats server performance | It costs money. | AVIF is not supported, you have to pay money or register multiple accounts to use it. | unsupported WebPrespond in singingAVIF The local compression eats into the server's performance |
Optimole
Update 2024.04.02: Now the free amount is reduced from 5k to 1k, which is not enough at all. Paid packages start from $20, if your website has dozens of millions of images, it is recommended to use it, you can upload all the images to the cloud and delete them locally to save space. Otherwise, it is not recommended to use it.
OptimoleIt's a newcomer, not many people know about it yet, only 200,000+ installs at the moment. I saw its introduction in the overseas speed optimization blogger Tom there and installed it with the mindset of trying it out. After a period of time to use found Optimole really fragrant, is so far we Diamo build site used the best picture optimization plugin!
It also comes with CDN function can be put pictures, CSS, JS to Amazon CDN acceleration, with this plug-in can not even use other CDN services! There are also cloud storage of pictures, if your picture is particularly large server hard disk capacity is not enough to move all the pictures to the cloud (media library does not store pictures).
Optimole Advantage:
- The ability to delay loading background images can preclude delayed loading of selected images;
- Mobile automatically resizes images to boost loading speed;
- Convert images to WebP/AVIF format;
- FREE! Unlimited number of image compressions/conversions!
- Automatically resize images according to the visitor's screen size;
- Automatically reduces image quality when slower networks are detected;
- Use the Amazon CloudFront CDN;
- Retina support, smart cropping;
- Delayed loading of images without jQuery (better);
- Image watermark function;
So many over-the-top, powerful features + free + unlimited compression/conversion times + CloudFront CDN (450+ nodes worldwide, no slower than Cloudfalre) + SVG, GIF compression + image exclusion. I'm just asking: who else!!!!

It is worth mentioning that Optimole supports automatic resizing of images on mobile, which is not available in other image optimization plug-ins. The general size of computer banner image is 1920px, and the volume is usually more than 100kb, while the mobile terminal usually shows the size of no more than 500px, and the volume is 50kb or less.

Mobile can automatically adjust the image size according to the screen size, the volume of the banner image alone can be reduced by at least 60kb so that the volume of a whole page can be reduced by at least 120kb or more. This is very helpful to improve the speed of the mobile terminal, but also to improve the Google speed mobile terminal score!
There is no such good free lunch under the sky, the free account only has an accelerating effect on the first 1,000 visitors (by ip/browsing device, repeat visitors are only counted once) to the website each month, the 1,001st visitor will start to display uncompressed raw format images (equivalent to this plugin being disabled), and the quota will be restored the following month.
If you don't want to pay, Optimole is only suitable for websites with less than 1k visitors per month, such as foreign trade B2B websites.Click here to see the methodology and details of visit counting. Forced use of CloudFront CDN cannot be turned off.
CloudFront CDN has these nodes in China: Shanghai (1); Shenzhen (1); Zhongwei (1); Beijing (1); Hong Kong (4). We haven't tested it, we don't know how the speed is in China, if you have tested it you are welcome to give us feedback.
The use of the process found that the 5,000 quota is very durable, will not count the number of known crawlers / robots browsing, repeat visits do not count the number of times, the vast majority of B2B foreign trade independent station and small blogs will not exceed the quota. If the traffic exceeds the quota, it is recommended to use ShortPixel and other plug-ins.
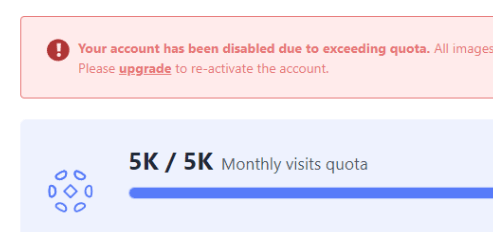
The Optimole settings screen has a display of the amount of visitors used. For example, the image below shows a total of 1k credits with 100% used.

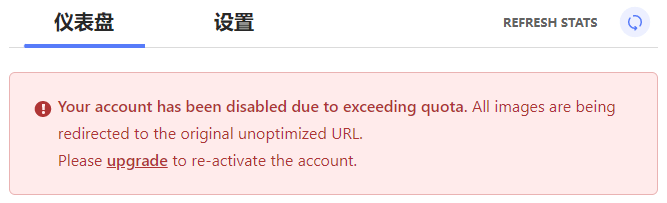
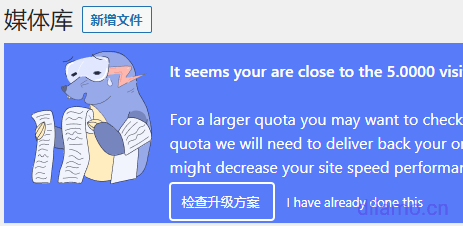
If the site has more than 1,000 visitors per month, an email will be sent to you prompting the purchase of a paid subscription, and there will also be a prompt on the plugin settings page as well as in the media library ↓. There will be no automatic deduction and the quota will be restored next month. Exceeding the quota may cause some images of the website to be displayed incorrectly, which should be dealt with in time.
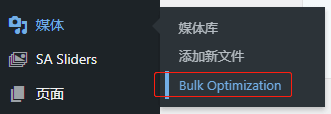
Optimole Setup Tutorial
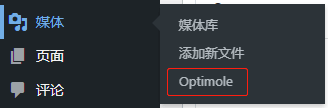
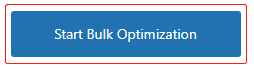
Entering the Settings screen
Enter your email ↓, click "Create & conect your account". It will send you an email to activate your email address, but don't worry about it, the plugin will work as usual.

Go to Settings > General.
Note: The same feature can only be enabled in one plugin/theme, if you enable delayed loading etc. in Optimole, don't enable it in other plugins!
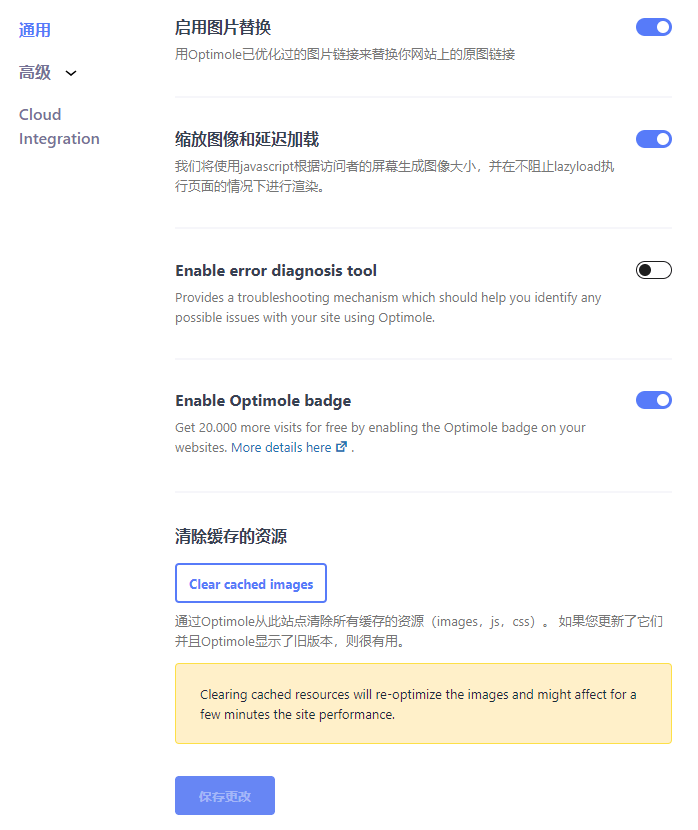
Enable image replacement:Turn it on and enable it before compressing to WebP, etc.
Zoomed images and delayed loading:Open, you can delay the loading of pictures and in the small screen size (cell phone + tablet) will display the appropriate size of the picture according to the screen, greatly reducing the size of the picture, improve page loading speed.
Enable error diagnosis tool:Close. Provides a troubleshooting mechanism that can help identify possible problems with the site using Optimole. Enabling this will increase the load on the server, so if you have a problem with your site then turn this option on to see why, click theView DetailsThe
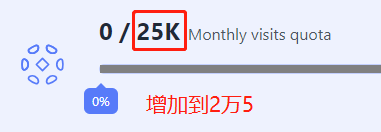
Enable Optimole badge:When opened it will display the icon below in the bottom right corner of the front end page, advertising Optimole. In return the free package will increase the amount of visits from 1k to 25k, which is very fragrant!
Please choose whether to open it or not according to your personal situation. From a marketing point of view when the number of users reaches a certain number, the official should cancel the activity, forcing some users to buy packages, which can both attract traffic and increase sales.
Next, click into the "Advanced" > "Compression" settings section ↓, see the explanation of the function, according to the need to open.

Enable network based optimizations:Turn on to automatically reduce image quality and load time when slower networks are detected.
Serving CSS and JS through Optimole:Close, it is better to use a CDN like Cloudflare. After all, more than 5000 visitors Optimole will fail, CSS and JS CDN acceleration on Barbie Q, and it does not support HTML, font acceleration.
Open Gif to video conversion:Turn it on, the video volume is at least 1/3 smaller than Gif, and the video can delay loading to shorten the loading time. If gif is similar to emoticon kind of small size and short time (small size), small size itself, don't suggest to convert to video, turn off this function.
Enable avif conversion:Open, greatly reduce the size of the picture, clarity is basically the same.
Enable Auto Quality powered by ML (Machine Learning):It is recommended to open it and it will adjust the compression level according to each picture. This is a trend, different photos need different compression levels to show the best results, a uniform compression level is not good for some photos.
If you don't open it, you can manually select the compression level of all the pictures, and generally choose the most suitable for the middle grade. If it is a photography website that needs to display super clear pictures, choose high grade.
Tip: After testing some sites with "Enable Auto Quality powered by ML"After some pictures are compressed too much and become blurred, encountering this kind of situationIf this is the case, please turn off this mode and select the compression level manually instead, selecting high grade. If it still doesn't work, rule out that the image is compressed.
Enter the "Resize" section ↓, according to the picture settings.

Enable smart cropping:Turned on, this feature will automatically adjust to show the main part of the image when the image goes out of the display box, instead of displaying the top part of the image in a fixed way. This feature is not used much and may conflict with other plugin's image features (e.g. delayed loading, auto zoom, etc.).
Enable retinal images:Turn it on to provide visitors with a retina definition image if they are using a Retina HD retina device.Retina requires that the image size be 2 times larger than the actual displayed size.If your image is made to the displayed size, turn this feature off.
If your picture size is more than 2 times larger than the actual display size (e.g. display 600*600, the picture size should be at least 1200*1200), and you want to display clear pictures in high-definition devices, open this function. Note: Enabling this feature will increase the size of the image and slow down the website speed.
Limit Image Dimensions with max width/height:Turn on to set a custom maximum width or height for the images provided by Optimole. When this setting is enabled, the Retina Image option is disabled to ensure consistency between images.
Resize large images original source:Set the maximum photo size that can be uploaded to the media library, if it exceeds the size it will be automatically cropped. It is recommended to set this to 1920 x 1200, most website pages have a maximum size of 1920px and will not exceed this size.
You can use this function to automatically crop images, if you have many square product images with different sizes and want to uniformly upload the size of 800*800px. You can set it to 800*800px here and the uploaded images will be cropped automatically. After uploading then set it to 1920*1200px.
Some customers come to us to optimize the website speed, we found that they haven't optimized the pictures at all, the size is super big and the volume goes up to 2M. the total volume of the page goes up to about 8M! Regular page size should be 300k~1M, turn on this function can greatly reduce the size of large size photos.
The "Exclusions" section is set ↓.
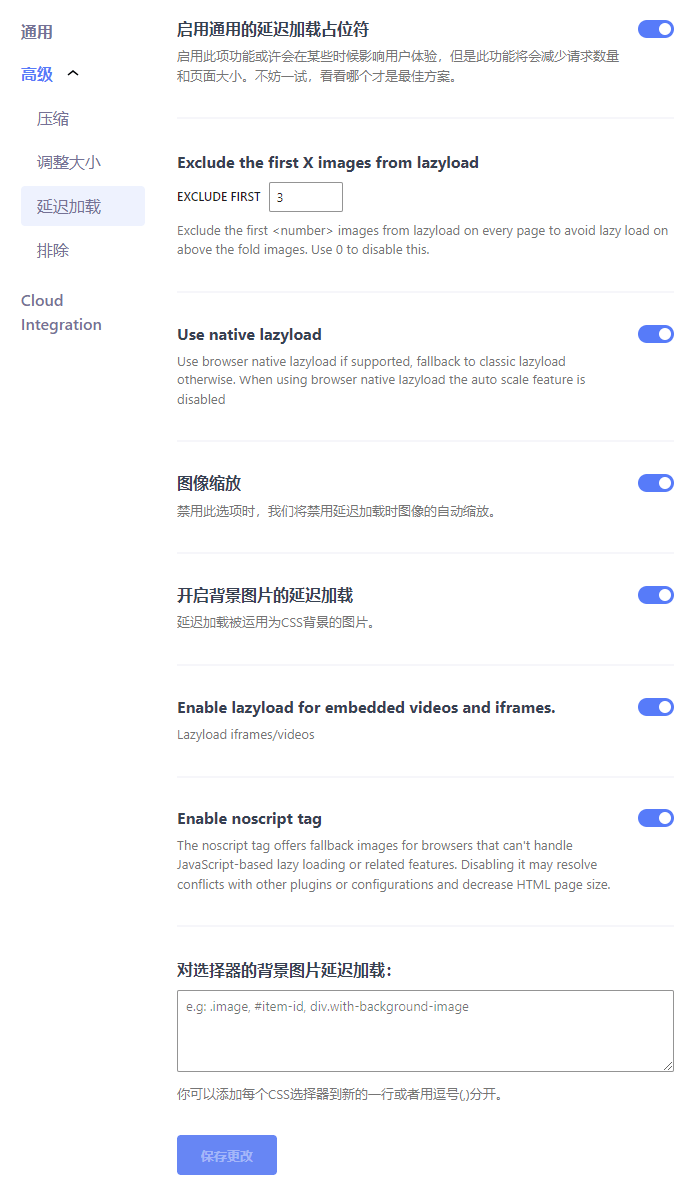
Enable generic delayed loading placeholders:Images that are delayed loading after opening will display a blurred version at first, thus increasing the page loading speed, which may reduce the customer experience a little. It is recommended to test the display effect after opening and turn off this feature if you are not satisfied.
Exclude the first X images from lazyload:Turn it on and exclude the first X images per page from the delayed load, set to 3 or 4 depending on the content of the first screen of images on the page, typically set to 3 or 4.
Use native delayed loading:Use your browser's delayed download feature, if enabled it will disable the smart cropping feature, it is recommended to disable it.
Zoom the image:Scale the image on delayed loading.
Enable delayed loading for background images:Open. By default, delayed loading does not apply to background images. When enabled it is possible to delay loading of background images by adding image CSS.
Enable lazyload for embedded videos and iframes:Turn on to enable delayed loading for embedded videos and iframes.
Enable noscript markup:Turn On. By default, this option will be turned off for new users and on for connected users. This will help load backup images for browsers that cannot handle Optimole-based features.
Selector for delayed loading of background images:Enter the ID or Class of the background image to be delayed loaded.
The "Exclusions" section is set ↓.
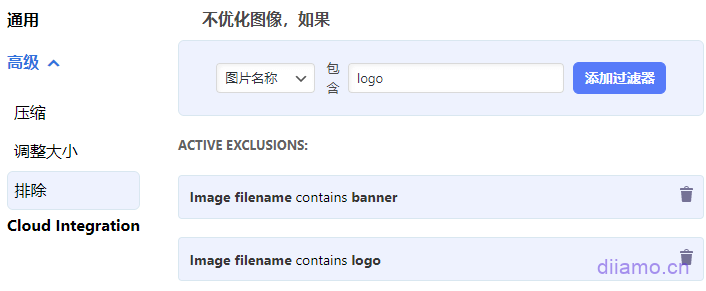
If some photos become blurry for you after compression, enter the photo name here to exclude it from compression. Just enter part of the text/words contained in the name of the photo, or you can enter the full name of the photo. It is also possible to exclude all photos on a specific page or images with a certain extension (png, svg) from being compressed.
Note: Photos that are excluded from compression will also cancel delayed loading, etc.

Enable cloud library browsing:Not recommended to be enabled. Enabling does not require logging into the backend media library of the website. You can directly access the photos in the media stored in the cloud online. This feature is not useful for most people.
Cloud Integration:It is not recommended to enable it. When enabled, all photos in the media library will be moved to the Optimole cloud and deleted from the website media library. This feature allows you to utilize the Optimole Cloud to store photos, thus reducing the burden on the server and freeing up hard disk space.
This feature is not recommended unless you have a very large number of images and have purchased the Optimole membership package. It is safest and secure to store the pictures on your own server. This feature does not help to increase the speed, but only to manage the photos. It's easy to make mistakes, so don't turn it on.
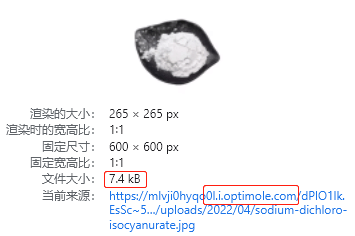
Note: Some images are loaded via css code (e.g. background images) and Optimole may appear to fail to compress them. First use theTinyJPG online image compression toolCompress the images before uploading them for use in the site's media library.
Once the plugin is set up, the photos uploaded before and after will be automatically compressed and processed without any other operation. If you still don't understand, you can check theOfficial Setup Tutorial, checking for gaps. If you have the Elementor plugin installed, you will need to regenerate the CSS and data as shown below.
If Wp Rocket is installed, you may be prompted to disable Wp Rocket's delayed loading of images to avoid conflicts. If you don't have delayed image loading turned on in Optimole, you don't need to bother with this prompt. The reminder should go away after clearing the cache with Wp Rocket.
If you enable the same function as Optimole in other plugins, please turn it off, otherwise there will be conflicts.After setting up the website, the pictures may be displayed incorrectly at the beginning, that's because the pictures are still in the compressed format.. Wait about 20 minutes to refresh the page after the picture is displayed normally, if the picture is particularly large waiting time will be longer.
Now open the page with Google Chrome and press F12 to enter Developer Tools to see that the image URL has been replaced with the Optimole.com URL, which means that the image compression and CDN acceleration have taken effect. Now you can useGTmetrixTest tools such as these look at changes in page size and load speed.
Optimole Frequently Asked Questions
1- The picture becomes very blurry:
Turn off the "Enable Auto Quality powered by ML(Machine Learning)" function in the "Compression" tab, and select the compression level manually, and try the highest level. Try to see if the image is restored. If it still doesn't recover, you can rule out that the blurry photos are compressed.
2- SVG image/icon color change:
Some SVG images/icons change color when compressed, just exclude them from being compressed.
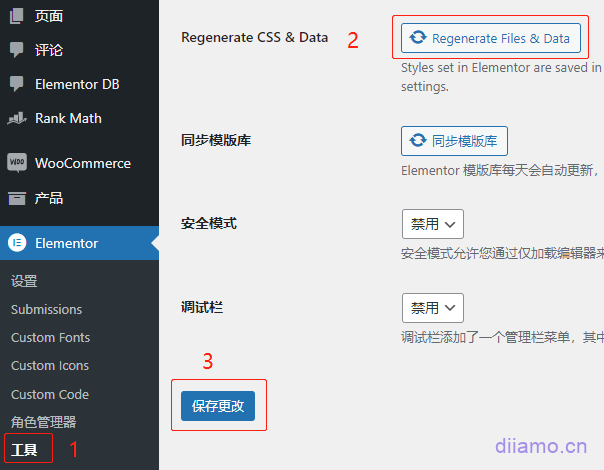
3- Pictures don't show up when free credits are used up:
The URL of the compressed image will be changed, after exceeding the quota, the image URL will return to the default URL, but the elementor code still shows the compressed image URL, so the image is not displayed.
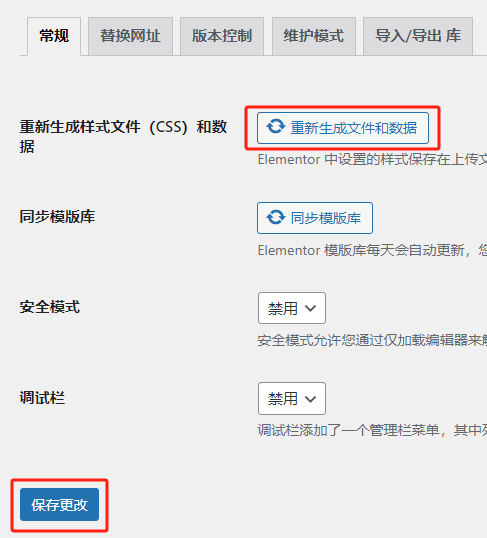
Solution: Go to Elementor "Tools".

Click the "Re-generate Files and Data" button, and then click "Save Changes" when the productive files are finished, and then clear all the site's cache.
TinyPNG
TinyPNGIt's a big old freebie.Online Image Compression SitesThe first is to maximize the size of the image while retaining the sharpness. Later launchedTinyPNG - JPEG, PNG & WebP image compressionThis image compression plugin. Free! You can compress 500 images per month, the image compression effect is better than ShortPixel, Imagify, this site's images use TinyPNG plugin to compress images.
We don't recommend it because it has several drawbacks: 1) non-adjustable compression quality; 2) non-restorable original images; 3) only 500 compression credits/month. Recommended UseEWWW Image OptimizerorRobin Image Optimizer pro, the 3 drawbacks just mentioned are perfectly solved by these 2 plugins.
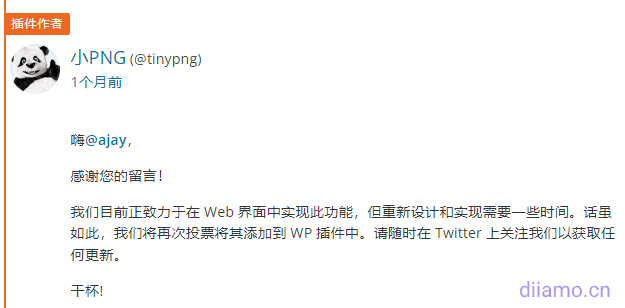
TinyPNG said in the forum that the plugin will support WebP in the future, at an undetermined time. When it supports WebP the competitiveness will rise tremendously, use it then.
Installation and Setup of TinyPNG Plugin
Next, download and installTinyPNGPlug-in, after enabling the plug-in top will prompt the content of the following picture, click the red box blue words to enter the plug-in settings page.
![]()
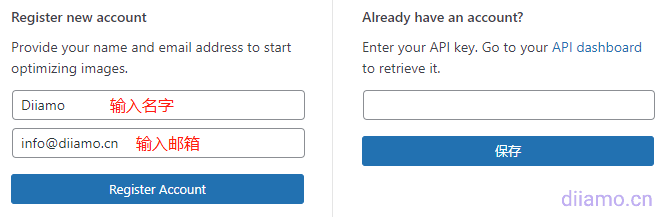
If you have registered before and already have API, directly enter the right box and click "Save". If there is no API, the left box ↓ enter the name and e-mail address click "Register Account" will send an e-mail to the mailbox.QQ mailbox can not be registered, use other mailboxThe
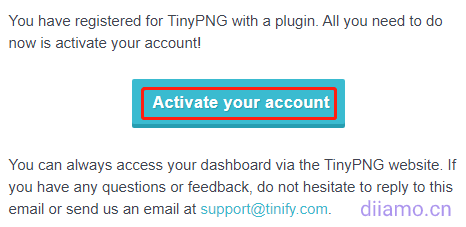
Receive an email titled "Activate your Tinify integration" (may be in spam mailbox), click "Activate your account" to enter the TinyPNG personal center of TinyPNG website. If you can't receive the email, go to https://tinypng.com, click "LOGIN" in the upper right corner, and enter your email address to resend the link.
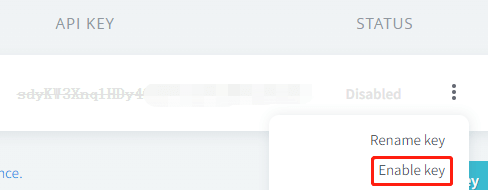
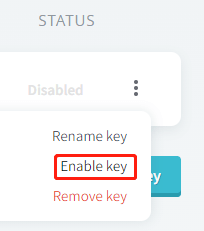
Click the three dots next to the symbol, and then click the pop-up menu "Enable key" to enable the API, copy the API KEY down to fill in the website plug-in settings page and click "Save".
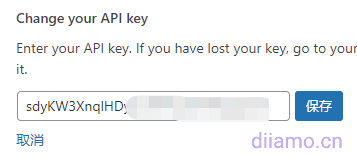
Tap "Change API key"↓.
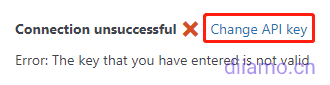
Enter the API and tap "Save", if the API is automatically entered, tap "Save" directly.
If multiple accounts are needed, go tohttps://tinyjpg.comRegister. After registering go tohttps://tinify.com/dashboard/apiCopy the middle position api to fill in the plugin settings page link account (position: "Settings" > "TinyPNG-...").
If the above URL registration is not successful, change tohttps://tinypng.com/developersRegister, enter your name, email ↓ click "Get your API key". Check your email and click the button inside to log in to the background, click "Enable key" to enable the api according to the following picture, copy and paste it into the plugin to use it.

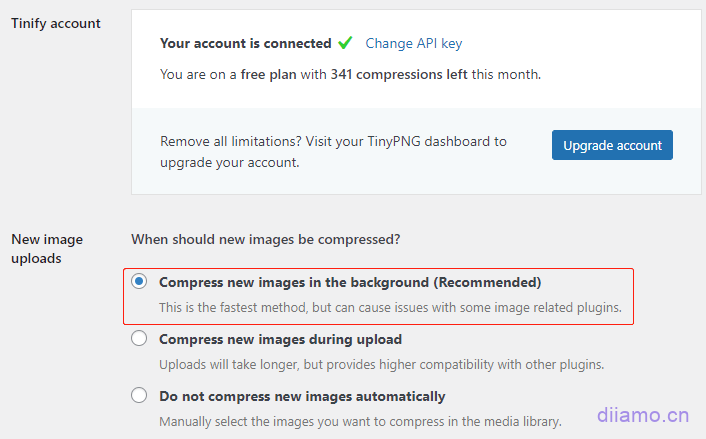
After the success of the linked account will show the remaining available credit, according to the picture, select the red box Compress new images in the background (Recommended) in the background automatically compressed; the second option is compressed when uploading, which will lead to uploading photos is very slow and very stuck; the third is manually compressed.
Note: You must select "Compress new images in the background" to compress the images automatically or "Do not compress new images automatically" to compress the images manually. "to compress the photos after the Performance Lab plugin is converted to WebP.
TinyPNG can not set the compression level and so on, the function is very little. It's because it's very mature technology has already defaulted to the optimal settings, no need to manually adjust. Each picture will be automatically analyzed for optimal compression after uploading, so there is no need to adjust the compression level.
Color profiles are automatically converted to standard RGB colors, CMYK is automatically converted to RGB to save more space and increase compatibility, and JPEG images are displayed faster using progressive JPEG encoding.
Below is a picture of checking off which sizes need to be compressed. Compressing thumbnails also calculates credits, so don't check the box for sizes that don't need to be compressed! The original image should definitely be checked, as well as the large size of the article and product pages.If there is one.Check the box, and check the product cover thumbnail size if available. If you are not sure whether the other dimensions are used on the website, it is recommended to leave them unchecked.
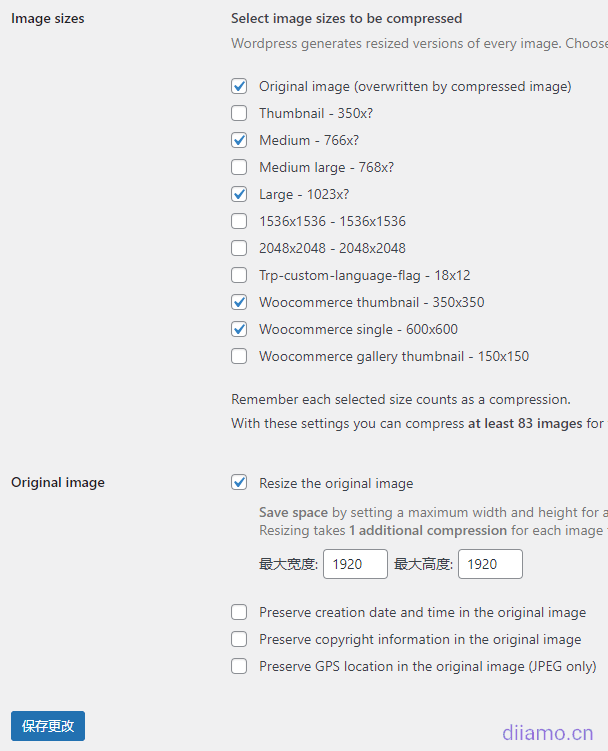
Original image:Resize the original image Recommended to be checked
The following three items will increase the size of the picture if checked, it is recommended not to check, please decide according to your own situation.
Preserve creation date and time in the original image
Preserve creation date and time in the original image
Preserve copyright information in the original image
Retain copyright information in the original image
Preserve GPS location in the original image (JPEG only)
GPS position preservation in raw images (JPEG only)
After this setup, the photos uploaded to the media library will be compressed automatically. If you have already uploaded photos, you will need to go to the media library and compress them manually. Here you can also see the number of compressed and uncompressed images.
ShortPixel
ShortPixel is currently the best and most popular WordPress image compression plugin, supports WebP and Avif formats, image compression rate and clarity are very good. We often browse foreign websites and see very big V recommended as well as use it.

ShortPixel has a full range of features, such as converting PNG to JPG, CMYK to RGB, converting to AVIF, adjusting the compression level of each image individually and restoring the original image, and the compression effect is also very good. The only drawback is that it costs money, free accounts have 100 compression credits per month, counting thumbnails and the like can actually compress less than 10 pictures.
Note: This compression amount is calculated based on the compression as well as the generated images, including thumbnails, which are very easy to use up. For example, if a jpg image is generated with 3 sizes of thumbnails, it is equivalent to 4 inquiries. Each inquiry compression as well as the generation of WebP and Avif format will be counted. This means that compressing one image will cost you 12 credits!
You must use a paid package to get enough credit, ShortPixel minimum $9.9 a month, this price makes many people stop. In order to give back to the VIP members of this site, Diamo has purchased an unlimited compression quota and number of sites API (activation code) from the ShortPixel official website. Any site paid annual, VIP members can be used for free!
If you are not a member, you can also pay to use our API without limiting the amount of compression and the number of sites, and send the API directly to you to activate yourself. Comes with a tutorial on how to use the settings and manual Q&A. ClickFree use/purchase of the ShortPixel APIThe
Imagify
ImagifyIt is an image compression plugin launched by the official team of Wp Rocket, with 700,000+ installations at present . It is simple to set up, easy to use, takes up less server resources, full-featured, fast compression speed, you can change the compression level of each picture individually (media library to open the picture to modify).
Inside the free plugin Imagify can be said to be the best comprehensive, powerful and easy to set up, so it is very popular, the installation volume is higher than several other plugins.2021 Imagify has a compressed package package, $9.9 to compress 10,000 images unlimited time, but then down (the pattern of small).
The downside is that the Avif format is not currently supported as well as the free account only having a 20M compression allowance per month. However, it is possible toSign up for multiple free accountsYou can switch between different accounts to continue compressing images. You can also spend $4.99 to buy a one-month package has compressed 500M compression quota (valid for one month).
Monthly payment $4.99, can compress 500M per month. monthly payment $9.99, can be unlimited compression↓
Setting it up is easy, there are tutorials all over the internet, so please move to Baidu.
EWWW Image Optimizer
EWWW Image OptimizerThe free version of the plug-in is also good, only can be compressed JPG (does not support compression of PNG, support for PNG to JPG), support for WebP format. No restrictions on the amount of compression, you can adjust the quality of the compressed picture and restore the original picture. And turn WebP after the picture quality is high, with the original picture is basically no difference, the disadvantage is that it does not support the compression of PNG pictures, it is recommended to use.
This plug-in is very famous, compression quality is also very good, I visit foreign sites to see a lot of big V recommended. The disadvantage is that the price is too high, a minimum charge of 70 U.S. dollars a year, 10 sites 150 U.S. dollars. As far as I know, some plug-ins use its image compression service, the price is a little more humane, if you are interested in their own Google search.

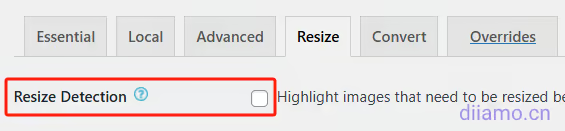
Please search online for tutorials. Note: If the following function is enabled, the front-end images that need to be optimized will show a blue dotted border (visible only to logged-in users), which is used to detect which images still have room for optimization. Turn off this option to make the dotted line disappear. It is recommended to enable the function of backing up the original images, there is a sub-menu of EWWW in the "Tools" section, you can restore the original images by clicking on it.
Robin Image Optimizer pro
Robin Image Optimizer proIt is a GPL version image compression plugin on our shelves, it can be said to be an enhanced version of TinyPNG, the settings are extremely easy to use. It has a few more advantages than TinyPNG: 1) unlimited compression amount; 2) optional compression level; 3) compressed images can be adjusted compression quality; 4) you can restore the original image. Unfortunately, the GPL version cannot use WebP format.
EWWW Image Optimizer can convert to WebP, but the settings are a bit complicated, and it can't compress PNG. both of them have their own advantages, so I suggest you try them both to see which one is better for you.
Smush (not recommended)
I still don't know much about image compression plugins in 2019, when Baidu toSmushNginx server needs to install the code to activate the WebP function, I installed the corresponding code in Pagoda according to the prompts, but still can not enable the function, decisively abandoned the pit. When I posted a post in the Pagoda forum to ask for help, including Pagoda officials, no one can give a solution, and until now there are still people who have been posting that they encountered the same problem.
Smuch 2018 won the best plugin award, the highest visibility, the current installed base of 1 million +. The free version has too few features, can't convert to WebP/Avif, can't adjust the compression level, the compression effect is not as good as the other 3 plug-ins, no compression count limit may be its only advantage.Pro version is $5/month, doesn't support Avif, and the WebP format disappears with the canceled package.
More than 1 million installations are estimated to be brought by the bundled packages, Smush Development has a total of 11 paid plugins, and a monthly payment of $15.83 allows you to use all of the plugins on 1 site, and a monthly payment of $82.50 allows you to use all of the plugins on countless sites.
If you think about it, you know that the probability is that you will resell it at a low price after you buy the unlimited site package, and it's easy to get up the installs. All things considered this plugin really has no particular advantages, and there are not many bloggers who have recommended it in the past few years, so it would be better to use a few of the plugins above.
It's compression rate and compression quality isn't great either
Other Image Compression Plugins
WebP Expressrespond in singingConverter for MediaSuch plug-ins are mainly to convert images to Webp, but not much compression, the volume is still on the large side. Not recommended
Compress the image before uploading
A few people in the Builders Exchange group have said that they like to compress their images and then upload them to the media library for use. There are a lot of free, unlimited amount of online image compression/conversion WebP tools, people look for. But I still like to use the plugin, convenient at the same time can generate Avif format, encountered inappropriate devices will fall back to display Jpg/Png format.
Further optimize image loading speed
In accordance with the above WordPress image compression optimization tutorial optimized, the image volume should be able to reduce 50% or even more, the picture loading speed has been greatly improved. In addition to compression volume, using the following methods can further greatly reduce the loading time ↓.
Delayed loading of images
In most cases, the volume of the picture can account for a page size of 60% or so, delayed loading of the picture acceleration effect is even better than compressed pictures, very important. By default, access to the page browser will load all the photos at once, the speed is slow.
After delayed loading of photos, when you visit a page, the browser only loads a few photos at the top of the page, and does not load the photos at the bottom of the page (the visitor slides down to the corresponding image position and then begins to load), so the loading volume is greatly reduced, and the speed is much faster.
Many plug-ins have delayed loading image function, we Diamo comparison found that the accelerated effect and display the best effect is Perfmatters plug-in, click to seePerfmatters delayed loading image settings method. ClickDownload Perfmatters pluginThe
Use the right image size
Picture size = display size is the best, the most clear at the same time the smallest size. If the image size is larger than the display size, the clarity is not necessarily better, but the size is bigger. If the image size is smaller than the display size, the photo will be blurred.
Choosing the right image size can reduce the size of the image and ensure clarity. The following "Responsive Images" ↓ method will automatically load the article/product images close to the display size. However, if you use Elementor or other page builders to build the page, the image display size may not be responsive, you need to manually select.
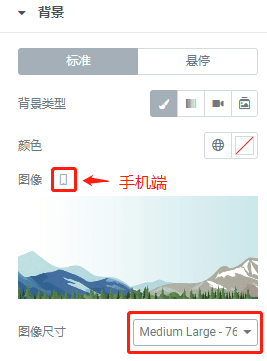
For example, the Elementor widget background image needs to be sized according to different devices ↓.
Responsive Photo
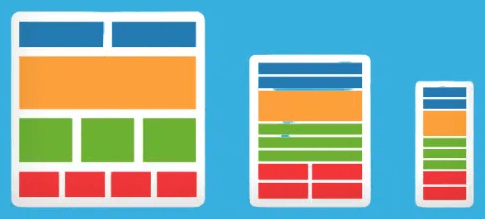
The screen size of computer, tablet and cell phone is different, and the size of the same picture will be displayed differently. Automatically displaying photos according to the screen size can greatly reduce the size of photos, which is responsive.
For example, when we upload a photo to the media library, it will automatically generate thumbnails of other sizes. For example, the width of the banner on the home page of an article is usually 1920px, and the volume is usually 100~200kb. After uploading the photo to the media library, it will automatically generate the size of 350px (the volume is about 20kb), so that when viewing the home page on a cell phone, if the pixel ratio of the screen is ≤350px, it will automatically display the banner with the size of 350px instead of 1920px, thus greatly reducing the size of the image. This greatly reduces the size of the image.
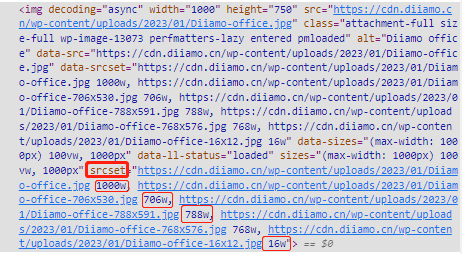
Most themes are responsive and do not require any manipulation. How to check if your website images are responsive? Check the html source code<img>Is there a srcset attribute inside the tag. Or use a test tool for mobile to see the size and volume of the loaded image.
The "srcset" attribute - this attribute describes to the browser how the image should behave. You assign the width of the image so that the browser checks for an image that matches the browser's width.
For example, this siteAbout UsAt the bottom of the page there is a picture of an office, below is the source code for this picture with the "srcset" attribute, inside the srcset attribute there are numbers such as 1000w, 706w, etc. These are the sizes that this picture is generated in. When the monitor size is ≥1000px, it will display a 1000px photo. When ≥ 788px but less than 1000px, it will display 788px size, and so on.
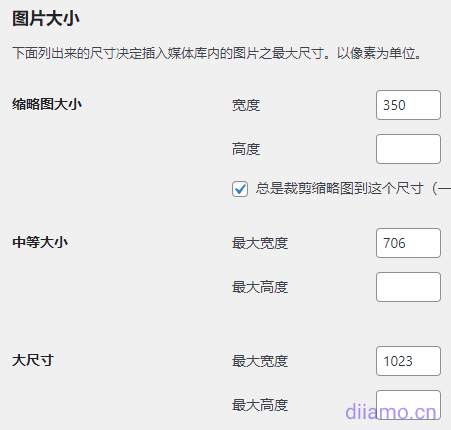
It is worth stating that we need to adjust the size of the automatically generated thumbnails according to the page image display size, especially Woocommerce site. In the background "Settings" > "Media" can be set inside the three thumbnail size ↓. You can also install the thumbnail plugin to set more thumbnail size, but also the previous uploaded to the media library of photos by size to generate thumbnails.
It is recommended that the media gallery size be set to the three sizes shown below, the cell phone will display 350 or 706px size photos, and the tablet will display 1023px. Mobile phones and tablets have a high resolution, so the image size is larger than the screen size to display clearly.
If your site is not using responsive images, it is recommended to use theShortPixel Adaptive Images pluginRealization (paid). With a single click, ShortPixel Adaptive Images replaces all the images on your website with right-sized, intelligently cropped and optimized images and uploads them to ShortPixel's global CDN.
Image compression plugin comparison ends here, if you have any questions or recommendations, welcome to exchange comments below. Optimize image loading speed in addition to the above mentioned compression volume, but also need to use the CDN, turn on the browser cache and so on in order to play the maximum effect. Please seeThe Most Complete Speed Optimization Guide for WordPress.. To purchase the Cache, Delayed Load plugin please go toPlugin DownloadPage.

