
The steps to set up automatic receipt of inquiry emails in WordPress using Fluent Forms Pro are as follows:
Forms Installation and Use
Installation and activation of Fluent Forms Pro (installed)
- Log in to the WordPress dashboard.
- Navigate to Plugins > Add New.
- Upload the Fluent Forms Pro installer or search for "Fluent Forms" in the search box, find the Fluent Forms plugin and install it, then activate it.

Foreign Trade Star has been installed for you, you can rest assured that the use of
Create new contact form (already created)
- In the WordPress dashboard, find and click on "Fluent Forms".
- Click on "New Form".
- Choose a suitable form template or create a form from scratch.
- Use the drag-and-drop editor to add and configure desired fields such as name, email address, message, etc.
Setting up e-mail notifications
- On the form editing screen, click the Settings tab.
- Select "Email Notification" or a similar option.
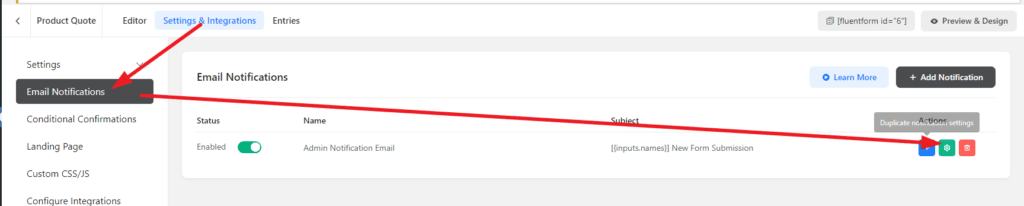
- Make sure you have "Administrator Notifications" enabled so that a notification is sent to your email every time someone submits a form.
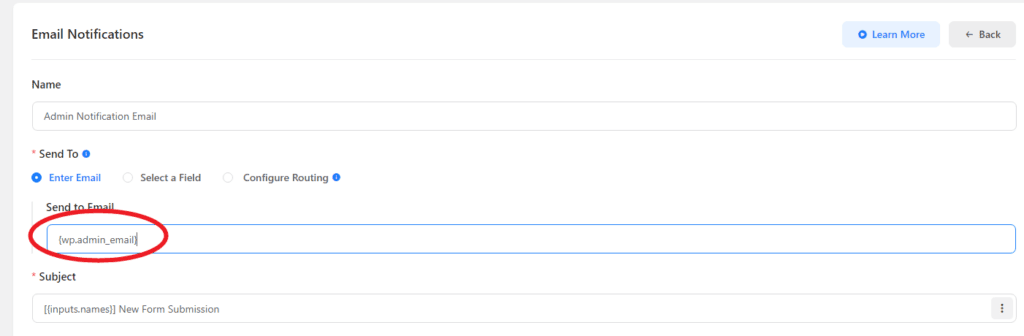
Default send to administrator, here you can change to your desired email address
- Enter the e-mail address you wish to receive inquiries from in the "Send to" field.
- Configure the subject, content, etc. of the email as needed. You can use smart tags to dynamically insert values for form fields.
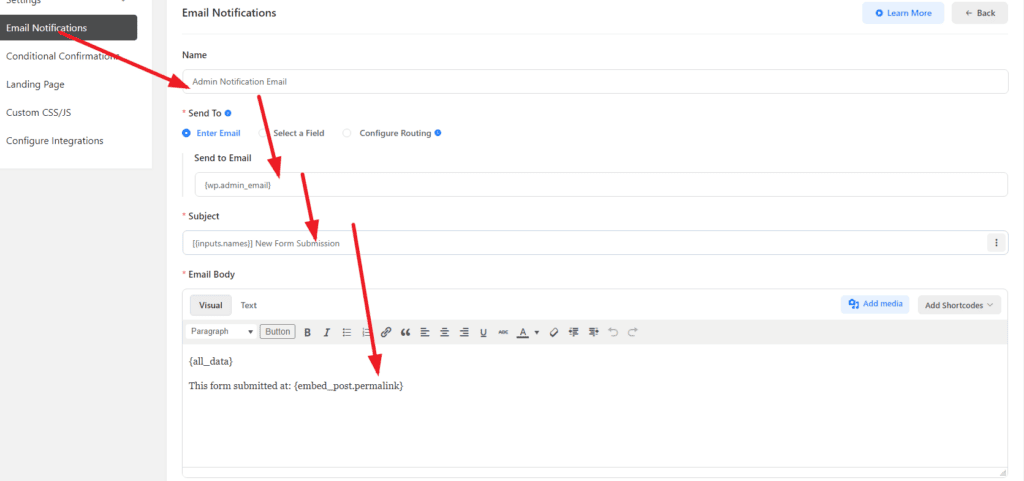
You can set up your own DIY inquiry content.
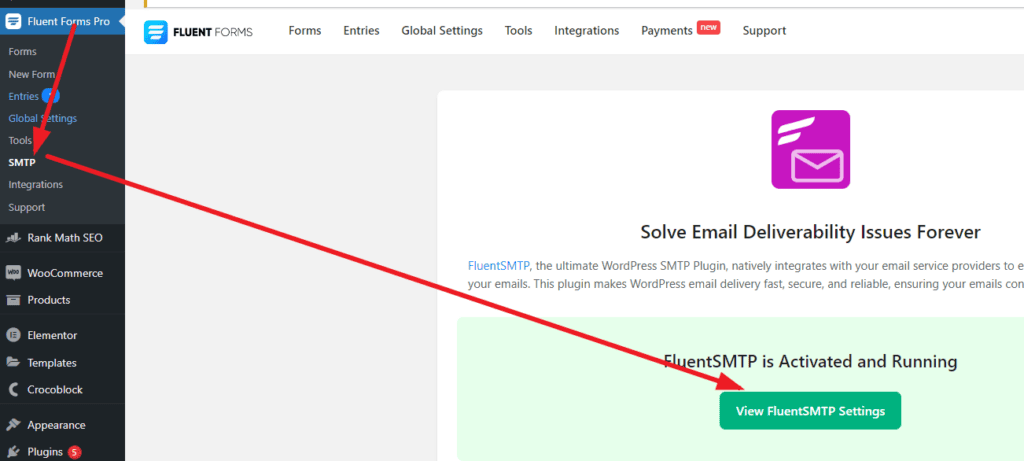
How is SMTP set up?
Enter the SMTP configuration
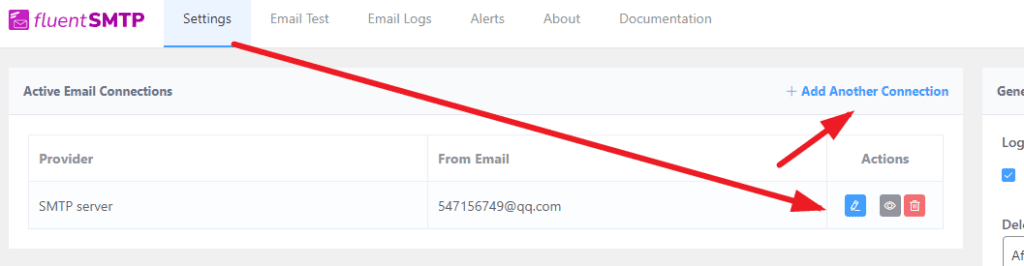
I have set up a configuration, you can modify the configuration directly, or you can delete and re-add it as follows
Choose your SMTP provider
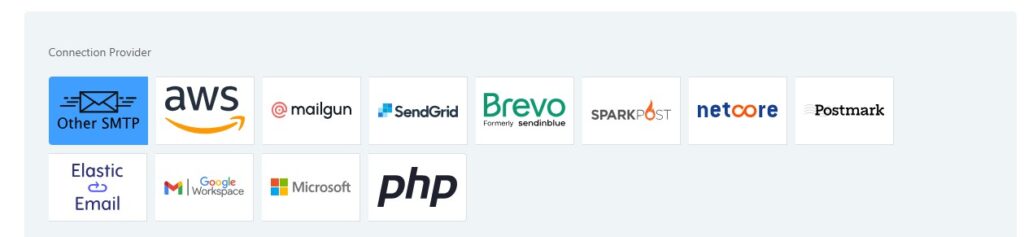
According to the requirements to choose the type you need, I use QQ, so use OTHER SMTP, if you use Google or enterprise mailbox, please choose the corresponding type, and then press the tutorial operation inside!
Configure your SMTP
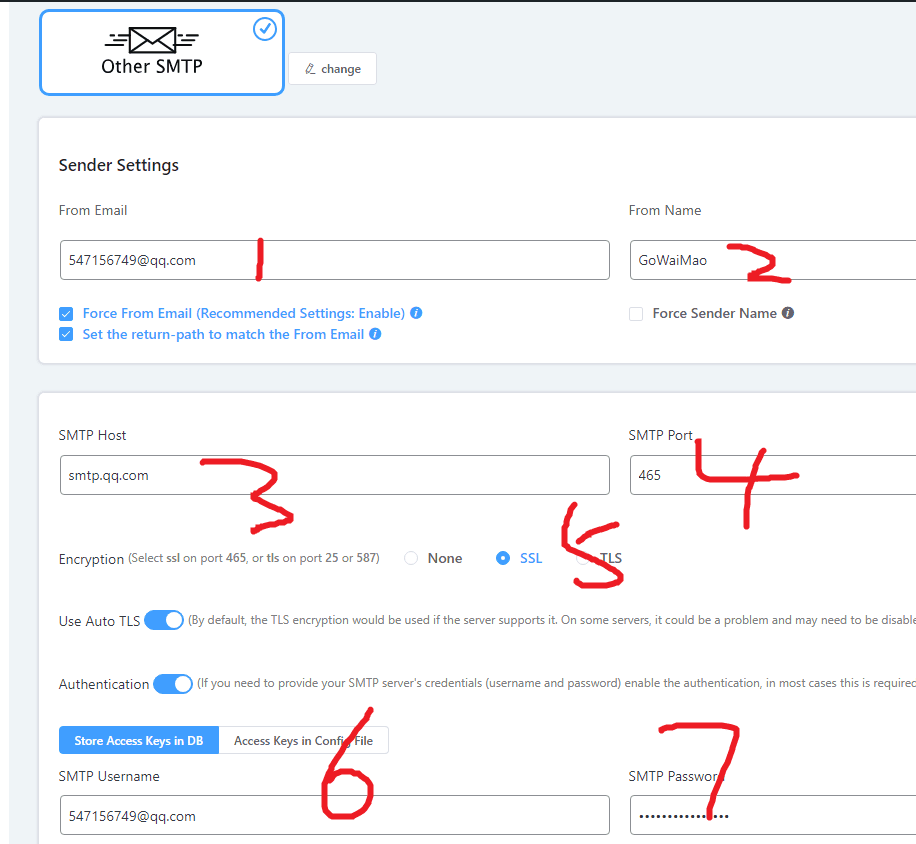
All 7 points should be filled out:
(prefix indicating ordinal number, e.g. first, number two etc)1 and 6can be the same QQ mailbox, the seventh is the corresponding mailbox authorization password, this to consult the purchase of enterprise mailbox customer service, ask him how to operate, in order to obtain this authorization code
(prefix indicating ordinal number, e.g. first, number two etc)3 and 4It is also necessary to consult the customer service to ask the corresponding SMTP and port value.
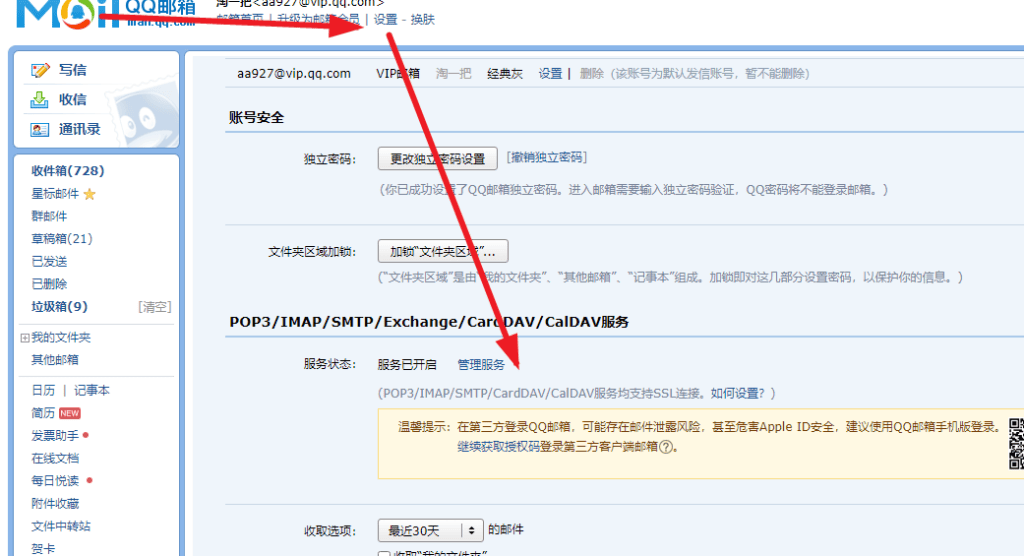
QQ mailbox authorization codeGenerally set up like this (Note: General enterprise mailbox management background have, if not consult mailbox customer service.) The following is a list of settings:
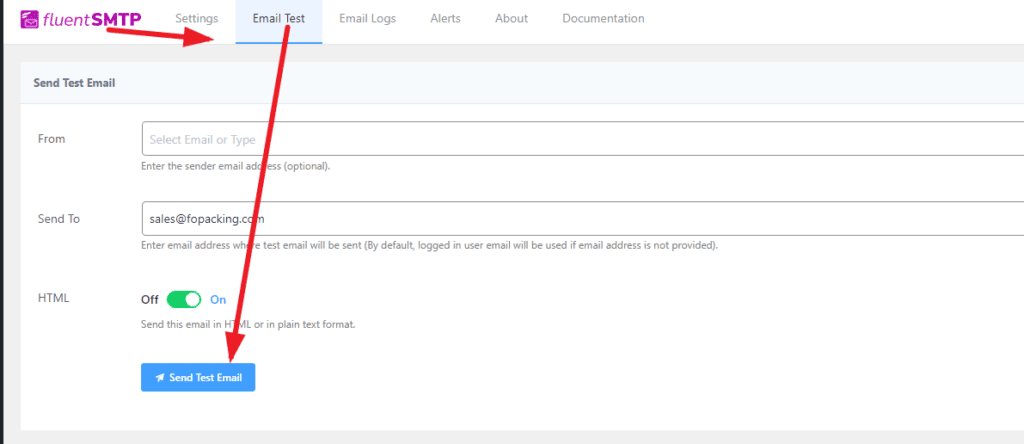
Publishing and testing forms
- After completing the setup, perform a mailbox test
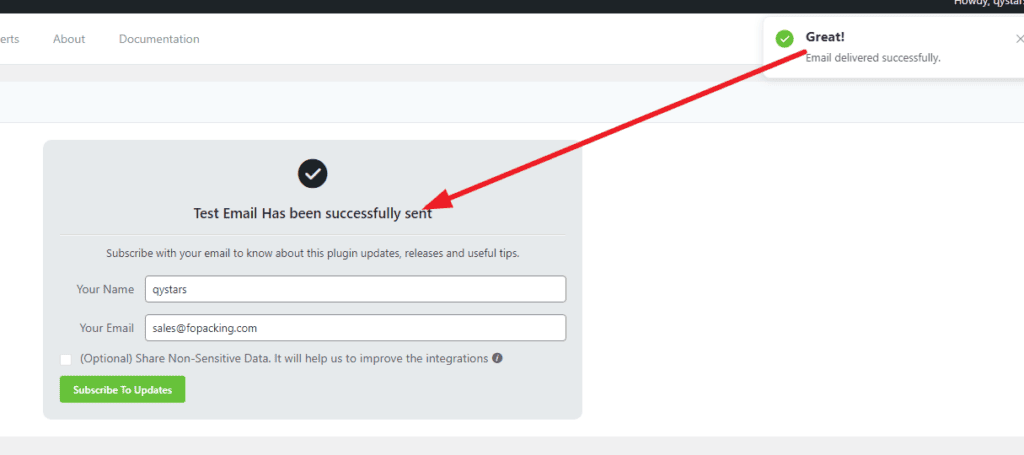
Congratulations, your mailbox is ready to receive inquiries normally~!
After completing the above steps, you will be able to automatically receive inquiry emails from WordPress sites.

